Building Your First App with Claude Code
A beginner-friendly walkthrough of Claude Code — from model selection and plan mode to shipping a working app.

Setup
Let’s build a simple app with Claude Code. Here’s all you need to get started:
- Create a new project folder
- Add an
index.htmlfile inside it - Open the folder in your editor (VS Code, etc.)
- Open a terminal and run
claude
The first time you launch Claude Code in a folder, it asks you to confirm you trust the directory:
1
2
3
4
5
6
Security guide

❯ 1. Yes, I trust this folder
  2. No, exit

Enter to confirm · Esc to cancel
Choosing a Model
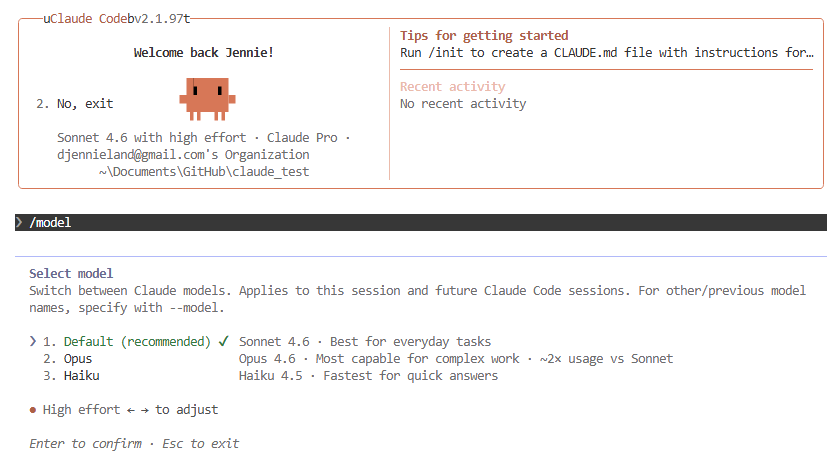
The default model is Sonnet. If you’re on a Pro plan and want to conserve tokens, you can switch to Haiku with the /MODEL command.
To lock a model so it persists across sessions, create a settings.json file in your project:
1
2
3
{
  "model": "sonnet"
}
After this, Claude Code will always start with Sonnet — even after restarting.
Plan Before You Build
Rather than jumping straight to implementation, have Claude draft a plan first. This saves a lot of back-and-forth.
Press Shift + Tab to cycle through modes until you see “plan mode on”, then enter your prompt:

1
2
Create a single-file HTML app for a simple Pomodoro timer with modern UI.
Include CSS and JavaScript in the same file.
Claude will generate a plan and ask for your approval before touching any files:
1
2
3
4
5
6
7
8
9
Claude has written up a plan and is ready to execute. Would you like to proceed?

❯ 1. Yes, auto-accept edits
  2. Yes, manually approve edits
  3. No, refine with Ultraplan on Claude Code on the web
  4. Tell Claude what to change
     shift+tab to approve with this feedback

ctrl-g to edit in Notepad · ~/.claude/plans/polished-waddling-kite.md
- Option 1 — Claude applies all changes automatically. Use this when the plan looks good.
- Option 2 — Review and approve each file one by one. Useful when you have many source files and want full control.
- Option 3 (Ultraplan) — Sends the local plan up to Anthropic’s cloud, where Opus 4.6 refines it for up to 30 minutes. Your terminal stays free while it runs. Once done, you can review the polished plan on claude.ai with inline comments and section navigation, then choose to implement it in the cloud or send it back to your local terminal. This is the most powerful option for complex features. → Watch how it works
- Option 4 — Give feedback and refine the plan before executing.
For this walkthrough, we’ll go with Option 1 and get something running right away.
Result
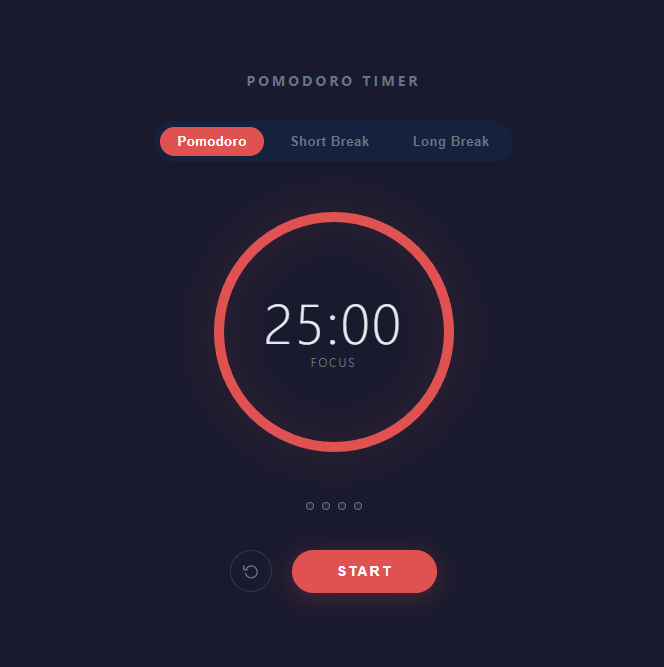
Once you approve, Claude Code generates the app. The entire Pomodoro timer — HTML, CSS, and JavaScript — ends up in a single file, ready to open in a browser.